


Hello Everyone!
I'm back with another attempt at a Nerdy Nummies recipe. I actually made these first a couple weeks for my friend's son's rainbow themed birthday party. I wasn't sure I would make a post on them, but I shared a picture on Twitter and so many of you lovely people thought I should. It's the type of recipe that you have to try a couple of times to get it right, because it can get a little messy. So it's probably for the better that I give you a more polished attempt.
Once again all of the credit goes to Rosanna Pansino for creating these little beauties in her amazing cookbook. I can't recommend this enough if you're looking to have a bit more fun baking!
Allow yourself plenty of time to make these, because there are a lot of times where you mixture will need to chill in the fridge before you can handle it. If you're super busy you can always do this in stages over a couple of days, which is what I have done and it still worked out great. But all of your effort will be worth it in the end! This recipe will make 12 cookies.
Step 1: Cream Cheese Cookie Mix
These aren't just your regular sugar cookies. Oh no, these are soft and chewy with the added cream cheese (which makes everything in life better, am I right?) I did have to adjust the ingredients a little bit for a couple of reasons. The mix was just so sticky last time and it made rolling very difficult. The cookies were also a little oily when they came out of the oven, so this time I have reduced the amount of oil (shortening) and added more flour.
Ingredients:
1/2 cup vegetable shortening or oil
1/3 cup butter, at room temperture
3 ounces (80g) cream cheese, at room temperature
3/4 cup granulated sugar
1 tablespoon powered sugar
1/2 teaspoon salt
1 teaspoon vanilla extract
1 large egg
2 & 1/4 cups all purpose flour
Food coloring (yellow, orange, pink, green, blue, purple) Or any 6 colors you like
Note: These cookies are quite plain, so for extra flavor you could add some lemon zest or essence!
Note: These cookies are quite plain, so for extra flavor you could add some lemon zest or essence!
Mix the shortening, butter, cream cheese, both sugars, salt, vanilla and the egg, in a large bowl with an electric mixer. Beat until it's light and fluffy.
Beat in the flour until blended. Use a spatula to scrape down the sides of the bowl and mix in any loose flour.
Now it's time to make it colorful!


You can do this one of two ways:
1. Get out 6 small bowls and evenly divide your cookie mix into each bowl. Thoroughly mix in you colors until you are pleased with how they look. Transfer each color individually onto a square of cling-wrap and pop them in the fridge.
or
2. Using one small bowl, mix in one colors one at a time and once you have wrapped one, rinse the bowl of any remaining color, dry, them do the next section of the mix.
It's up to you how you do it, but the second method means less dishes to deal with!
Leave the wrapped colors in the fridge for at least an hour for them to be firm enough to handle.
Step 2: Assemble the rainbow


This is where things can get a little sticky, so take your time and just have fun with it. And if it's too difficult to handle, just put it back in the fridge.
Unwrap one color at a time and roll the mixture into a log on top of the cling-wrap. Don't use flour! Cut in half, then roll into another log and cut into six even pieces. Take one piece and roll into a ball (they don't have to be perfect) and do the same with the other half. You should have 12 balls of each color in a similar size.

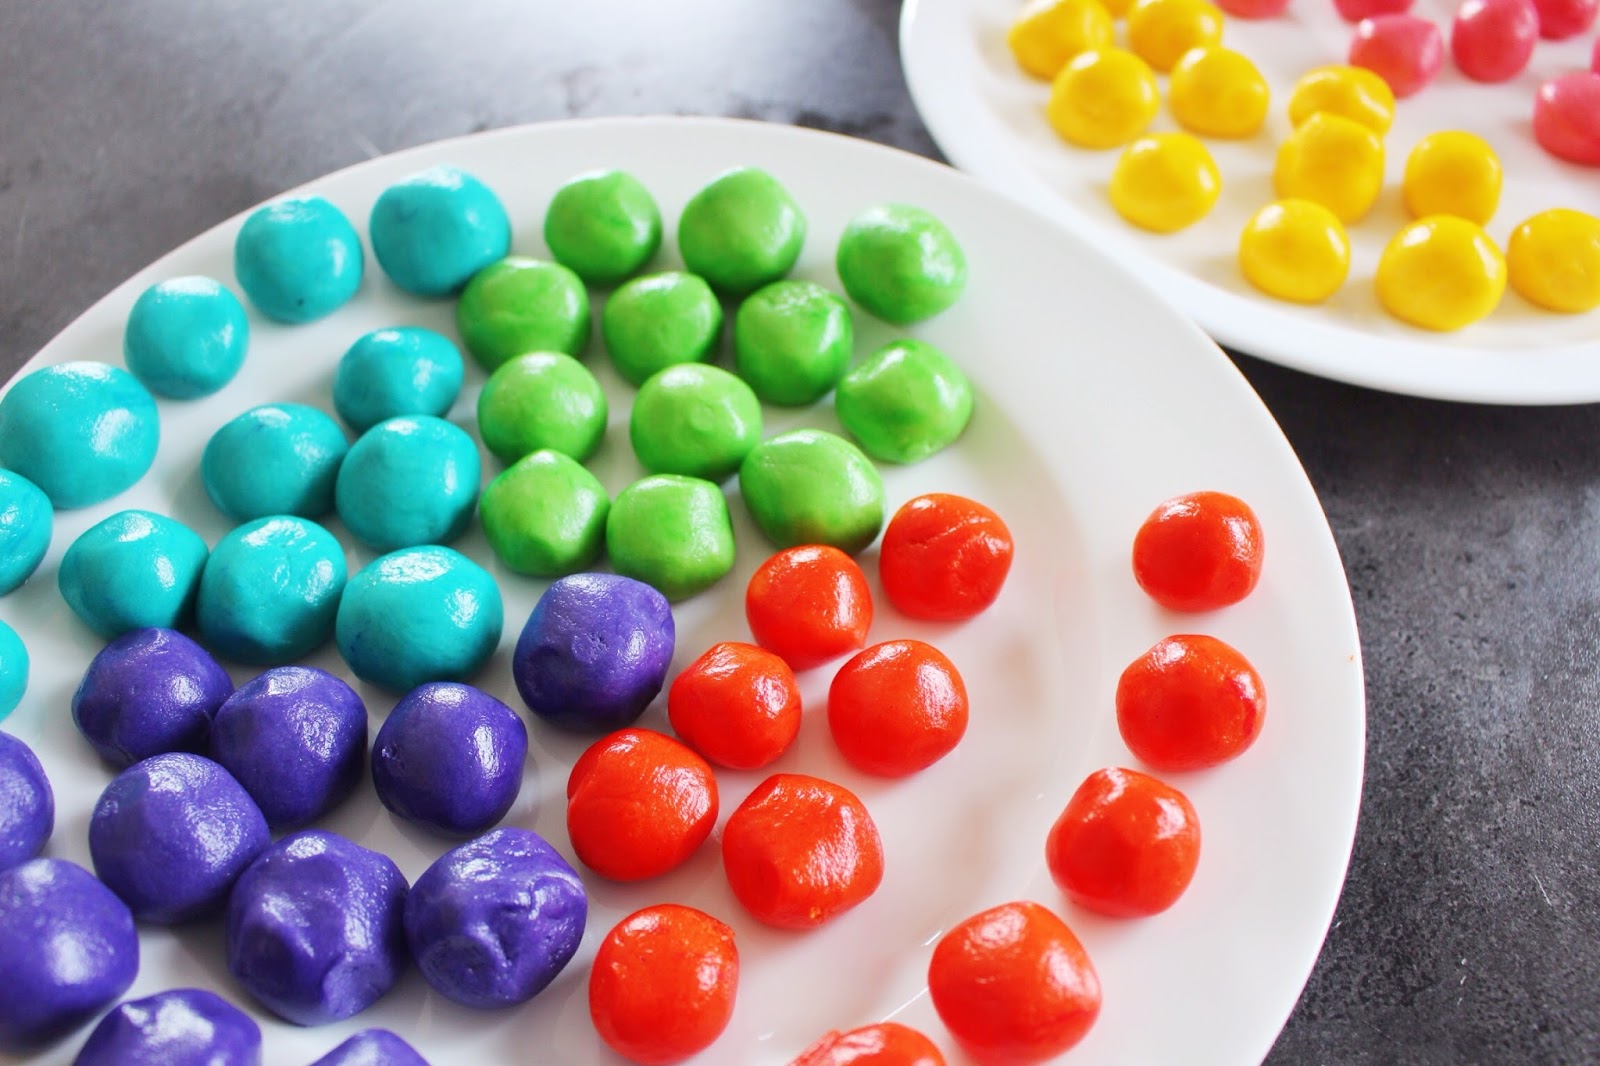
I placed mine onto plates as I went and when I was done I put them back into the fridge for another 15 minute. *Cue snack and Twitter time while you wait for them to firm up again.
Get out two baking trays and line them with baking paper. I used pizza trays so that it was easier for me to fit them in the fridge and I could spin it around whilst arranging the cookies.
Place down a layer of cling-wrap (or baking paper) on your bench and get the plates out of the fridge.

You're gonna grab one color at a time and roll the ball into a log about 5 inches long. Using one of each color, you're going to make two layers of three logs.
On the bottom put yellow, orange, then pink. Then put the green on top of yellow, then blue and purple.


When you're done, put them onto the baking trays and leave them in the fridge to set for 20 minutes. This way they will be much easier to handle.
When they have had enough time in the fridge, pull the cookies out and preheat your oven to 180*C (or 350*F)
Note: If you have an oven with a fan-bake option, just stick to the normal bake setting or they will lose their shape!


To form the cookie shape, gently take one end of the colored log and twist once or twice. Do the same with the other end, but twisting the opposite way until it forms a rainbow spiral log. Then take one end and gently curl it into the other and place one end on top.
You can pat down any bits that start to break and they will easily smooth out again.
Do the same for the rest of the logs and gently arrange them so that they are spaced out on the baking tray.
Put them back to the fridge for another ten minutes, then in the freezer for 2 to ensure they hold their shape. Told you there was a lot of fridge time involved! This is the last time, I promise.
Now you can finally put them in the oven for about 11 minutes or until they feel set/dry but not brown.
Let the cookies cool for 2 minutes, then transfer them to a wire rack. While they're still warm you can decorate them with some pearls and rainbow sprinkles to make them look even more magical!


Ta Da! How cute are these cookies! They were definitely a lot easier to make when I changed the mix a little bit. Perfect if you want to cheer someone up with colorful cookies!
Here's the YouTube video Ro posted for the cookies if you are interested.
Hope you enjoy!
Do you guys have a favorite cookie recipe? I need to make more! : )
Steph x.
OH EM GEE! These are amazin' <3 so vibrant too! xx
ReplyDeletezaras-bowsandpearls.blogspot.co.uk
Thanks so much! Almost too pretty to eat : )
DeleteSteph x.
THESE LOOK INCREDIBLE! I bet they taste even better. I am so making these in the weekend! :)
ReplyDelete-Leta | The Nerdy Me
Aw thanks! Send me pictures if you do? : )
DeleteSteph x.
These look like so much fun!!! =)
ReplyDeleteDefinitely pinning for the future!! =) Melanie | Blog: Toots + Dill
Thanks, Melanie! They're quite fun to make. Hope you enjoy!
DeleteSteph x.
These are just magical! I definitely want to try these out! :)
ReplyDeleteEmily / The Mini Mermaid
Right?! I still can't believe how they turned out. Let me know if you do!
DeleteSteph x.
These look absolutely amazing! And they're making me hungry haha! I'd love to try and make these - such a great post!
ReplyDeleteCharlotte XX
https://thisbeautylover.wordpress.com/
Thanks so much, Charlotte! You should try it, it's easier than it looks : )
DeleteSteph x.
These looks so magical, I really want to try making them. Thanks for sharing. =^-^=
ReplyDeleteSam | Momentarily Dreaming
Thanks, Sam! Tag me if you do : )
DeleteSteph x.